

2. Asset Creation - November Sprint
- Harrison Snatt
- Nov 3, 2021
- 3 min read

Updated: Jun 23, 2022
> November 3
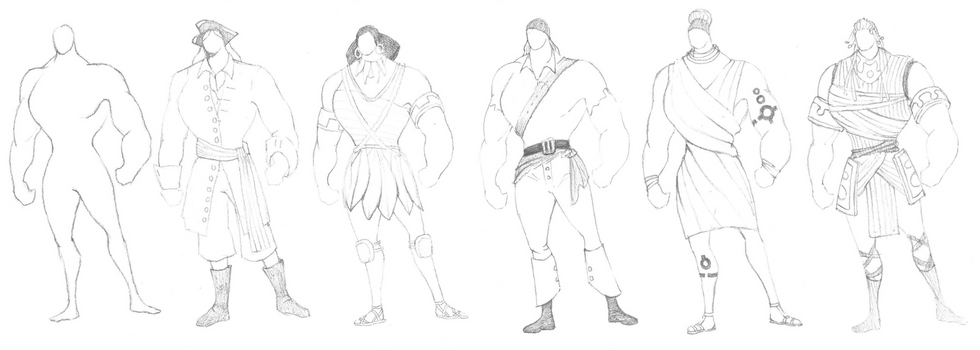
We talked about the character concept, shoulder mounted weapon, overall arena, white box and trees. Using Unreal's landscape painting tool I created this quick mock-up arena to show the team my idea for the game environment. I had the idea to have the game set in a jungley cliff cove because I wanted some kind of natural arena to play in as well as an obstruction of view to the void of space in Unreal.


The bottom images I made with some rough rocks in Blender and then painted over in Photoshop. I had hoped that these images would help the team get a better idea of the environment which it has to some degree but still I think we are on a different page with it all.
I want to upload all my models and their textures on the drive properly with their centre points and scale corrected. Some models I need to decide their textures are done like the map and bottles.
> November 10
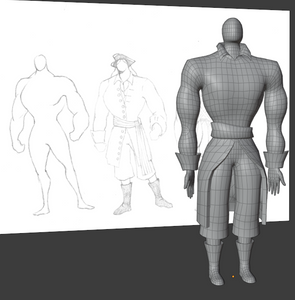
Today our group discussed a lot on mechanics and how our sprint was coming along. As usual a lot of ideas were brought up but a lot was concluded to be something to look at later. For now our goals in my opinion should be on cracking down on asset production and proper implementation. I worked on character concepts and began modeling a preliminary character so that we can get that in game asap for Jade. Sometimes the group discussions are about ideas that we crossed off ages ago being brought back up which can be disconcerting.


Asset Creation Process
Throughout this project I have unwrapped and textured plenty of assets for our game.
First the unwrap. For most assets the seams should run along hard edges and cavities or be at least concealed in areas less visible. Blender's unwrap tools are not bad but not fully developed. After cutting in the seams I unwrap and asses for stretching. (In the UV display settings you can turn on a stretching view mode). After I'm happ I try to pack the UV islands together as close as possible. Blender does a 70% good job of this but I always try to make the best use of UV space.
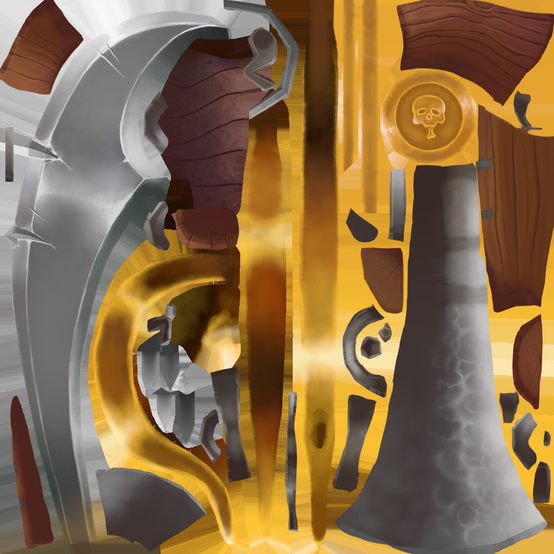
For our game's hand-painted flat non-PBR style we tried to maximize the use of textures by having objects share UV space and have elements of their texture be repeated. This can be done automatically if using mirroro modifier in Blender or by hand using vertex snapping and merge by distance islands on the UV can be made to perfectly overlap. The islands that are overlapping will result in bake errorso so to get useful bake information for texturing offset all but one of each island type by one whole grid in Blender.
When creating textures for our game I knew that I could always reduce texture resolution later on so I predominantly used 1k textures. The first step for all assets being textured is to create a bake (using self) to generate position, curvature, ambient occlussion and world position. Using the bake information I can then more efficiently generate a hand-painted texture in base colour only.
My basic pipeline overview
Base colour variation
- use grunge fill in triplanar projection
- use gradient filter to asign colour to each part of the greyscale
- use blur slope or warp to break it up
- use position generator to add gradient to whole thing
Highlights
- develop colour variation with top down light generator
- use curvature generator for edges and cavities
Darkness / Grunge
- ambient occlusion on multiply for either warm or cool shadows
- grunge fill layer with cavity and hand-painted mask
Adjustment
- use a fill layer with all channels turned off
- set to passthrough
- add HSL or colour balance filter to make adjustments to hue, sturation and lighting
Hand-Painting
- at all steps along the way use masks and a variety of brushes to get the desired effect through hand-painting


.png)
.png)
.png)
.png)
Comments